
How to Create a Time Freeze Video from One Photo
Create a 15-second AI time freeze video from one photo. Follow the steps, compare two real examples, and check the credits, settings and limits before you start.
 The Seadanse Team6 min read
The team behind Seadanse. We run the models we write about, and we publish the specs, prices and limits the marketing leaves out.

You walk through a busy street. The people around you stop, droplets hang in the air, and you keep moving. That is the time freeze video this guide helps you make from a single portrait.
With Seadanse's AI Time Freeze Effect, the scene and story are built in. Upload your photo, keep the default settings or choose a different setting, check the price, and create your clip. You do not need to write a long prompt or edit a freeze into existing footage.
This walkthrough uses two real examples made from the same photo: a street and a coffee shop. Both used Seedance 2.0 Standard at 480p, in vertical 9:16 format, with a requested length of 15 seconds.
What you need before you start
Have one clear, well-lit photo of one person ready. A selfie is enough; a full-body photo provides more visible clothing details. You also need to sign in and have enough credits for a generation.
The effect uses a fixed model, Seedance 2.0 Standard, and a fixed 15-second duration. The settings you can choose are:
| Setting | Default | Other choice |
|---|---|---|
| Scene | Street | Coffee shop or Subway station |
| Shape | Portrait 9:16 | Landscape 16:9 |
| Resolution | 480p | 720p |
| Note | Empty | Add an optional scene detail |
Your photo is the only required creative input. You can leave the scene, shape, resolution and note exactly as they are.
Step 1: Upload a portrait, even if its background is different
Open the tool and select Upload photo under Your portrait. Choose a picture with a clearly visible face so the model has a useful reference for the main character.
The photo supplies the character reference, not the opening frame. A selfie taken indoors can become a street scene; you do not need to photograph yourself in a crowd first. Choosing Coffee shop generates that setting rather than keeping the room behind you.
Here is the reference photo used for both examples in this guide:
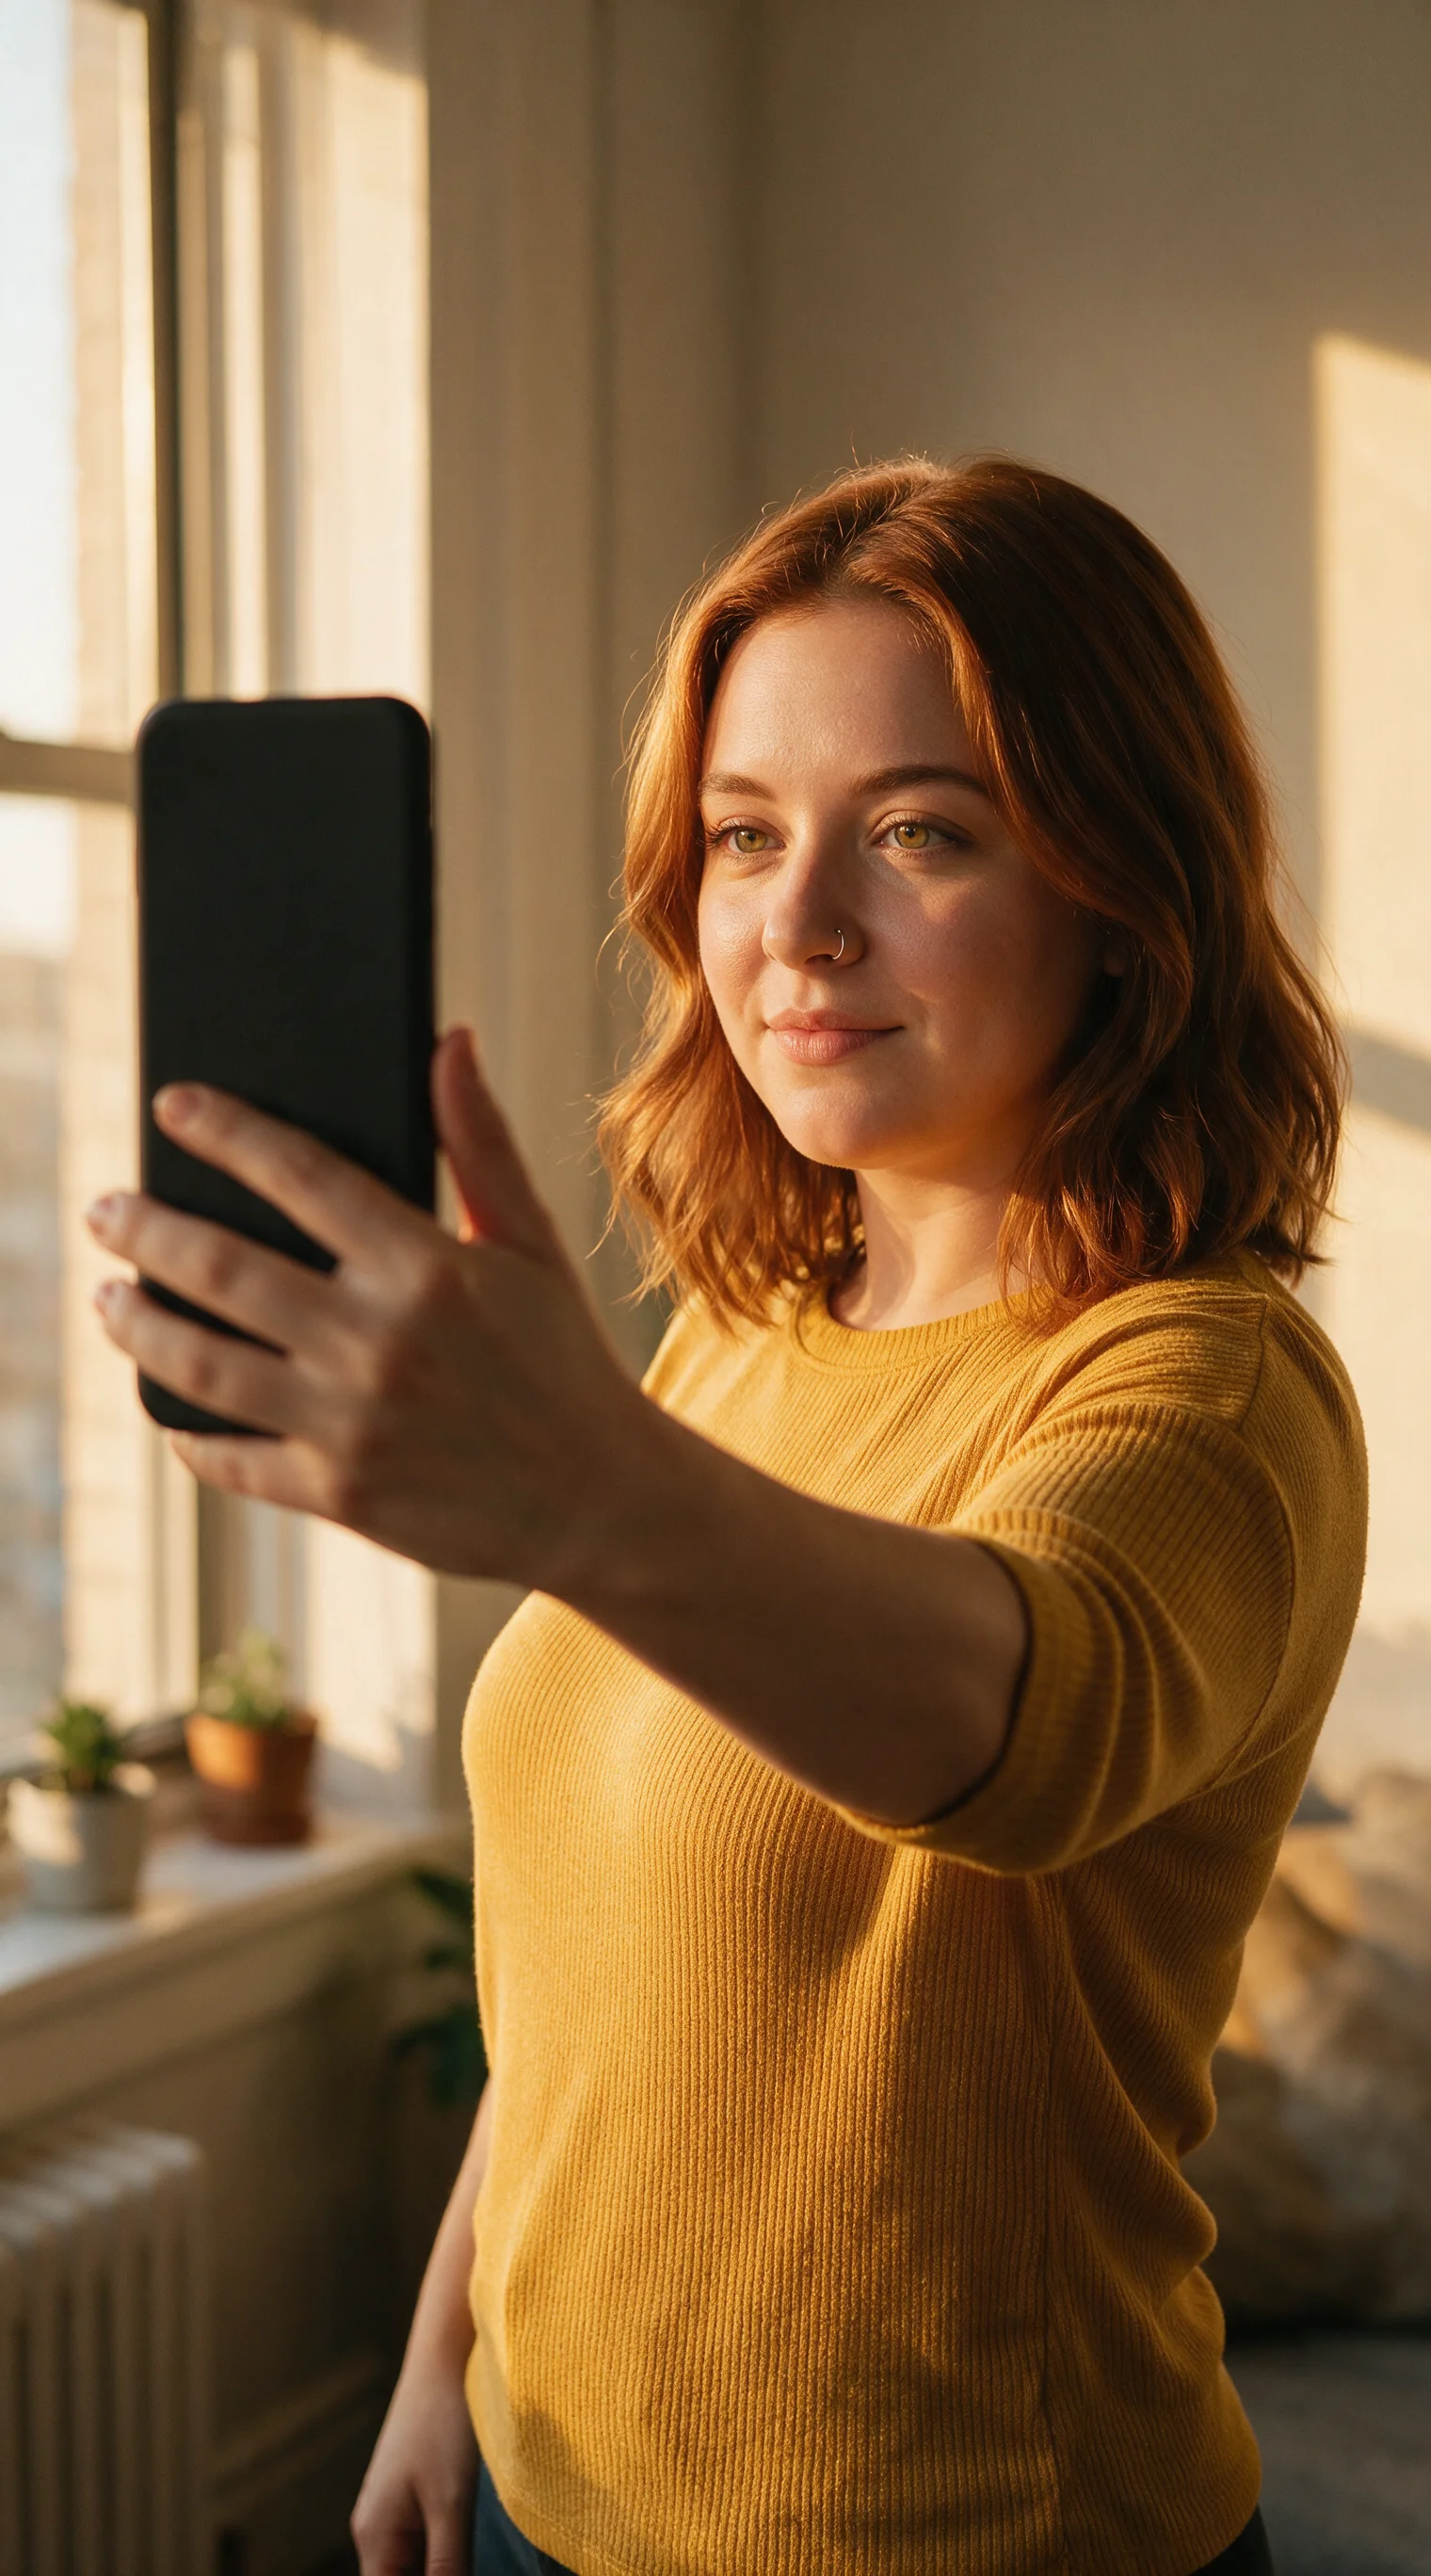
Both generated clips kept visible features such as the character's red hair and mustard-colored top while changing the location. That shows how the reference works in these examples. It is not a promise of an exact likeness from every photo.
Step 2: Keep the street scene or choose another location
The generator opens with Street selected. Keep it for an outdoor scene, or select Coffee shop or Subway station.
The built-in story follows normal movement, a snap that stops the surroundings, a walk through the frozen world, and movement returning. You do not have to describe each beat yourself.
For the shortest setup, leave Add a note (optional) closed. If you want to add a scene detail, open it and enter a short request. The note supplements the ready-made effect; it is not a requirement to generate.
We used Street and Coffee shop for the two examples in this article. We also verified that Subway station can generate successfully on the live tool with the 15-second, 480p settings. The two clips below give you a concrete starting point for choosing a look.
Step 3: Choose your format and check the credit cost
Keep Portrait 9:16 for a vertical clip, or choose Landscape 16:9 for a widescreen project. Then select 480p or 720p. The duration stays at 15 seconds.
| One 15-second generation | Credit cost |
|---|---|
| 480p | 360 credits |
| 720p | 780 credits |
The scene and aspect ratio do not change these prices. Review the displayed cost before you submit.
Free signup adds 40 starter credits, which are not enough for a complete clip. The $9.90 credit pack provides 495 credits, enough for one 480p generation. It does not cover a 780-credit 720p generation on its own. See Seadanse pricing for credit options.
Both examples here used 480p and Portrait 9:16. We have not tested the other format combinations for this guide, so the footage does not demonstrate their quality.
Step 4: Create, preview and download
When your photo has uploaded and your settings are ready, select Create. If you are signed out, use Sign in to create first. Your account needs enough credits for the selected resolution.
Wait for the result, then watch the full clip before downloading. Check the beginning, the frozen section and the return to movement. Does the main person keep moving? Do the surroundings look still? Does the face remain recognizable enough for your purpose?
The output is an MP4 with audio, with no watermark on the exported video. Listen to the sound as well as checking the picture, especially if you plan to add the clip to a larger edit. The effect generates audio; it does not offer a promise of precisely timed sound cues.
What the two examples actually show
Street: a moving character in a frozen crowd
The indoor portrait becomes an outdoor street. The main character walks and gestures while people hold their poses, with a bird and droplets suspended nearby. Movement returns near the end.
The camera moves closer and farther away during the shot. The liquid looks like round floating droplets, and the raised-hand gesture lasts longer than a quick snap. Use this as an example of the effect, rather than a promise of exact camera movement or choreography.
Coffee shop: a more magical-looking freeze
The same portrait becomes a character walking through a cafe. Cups and liquid hang around the character before motion returns.
Here, the floating cups and liquid arches are exaggerated. They look closer to a magical effect than a natural coffee spill. If realistic liquid motion matters to your project, watch this example before spending credits.
These are two individual results, not a success-rate study. Neither establishes that every photo, scene or setting will produce the same freeze.
What happens if a generation fails?
A technical generation failure or timeout releases the held credits automatically. A finished clip you dislike is different: it does not receive an automatic refund simply because the creative result missed your expectations.
Creating another version uses credits again. Before rerunning, decide what you want to change: the reference photo, the scene or an optional detail. Keep the cost of each new attempt in mind.
Is time freeze the same as bullet time?
On Seadanse, the distinction is who moves. This time freeze effect keeps the main character moving through frozen surroundings. The Bullet Time effect freezes the main character in mid-air while the camera moves around them.
If you want to walk through a stopped world, start with one clear portrait in the AI Time Freeze Effect. Street, Portrait 9:16 and 480p are already selected; check the 360-credit cost, then create your own version.


